
How to automatically compile and distribute your iOS SDK as a pre-compiled xcframework
Note: This is a cross-post of the original publication on contextsdk.com.
Introduction
In this technical article we go into the depths and best practices around
- Working efficiently on a commercial SDK in a larger team
- How to compile and distribute your iOS SDK as a pre-compiled xcframework automatically
How to build and debug an iOS SDK?
At ContextSDK we have our whole iOS Swift codebase in a single local CocoaPod. This allows us to iterate quickly as a team, and have our SDK configuration defined in clean code in version control, instead of some plist Xcode settings.
ContextSDK.podspec
Pod::Spec.new do |s|
  s.name             = 'ContextSDK'
  s.version          = '3.2.0'
  s.summary          = 'Introducing the most intelligent way to know when and how to monetize your user'
  s.swift_version    = '5.7'
  s.homepage         = 'https://contextsdk.com'
  s.author           = { 'KrauseFx' => 'felix@contextsdk.com' }
  s.ios.deployment_target = '14.0'

  # via https://github.com/CocoaPods/cocoapods-packager/issues/216
  s.source = { :git => "file://#{File.expand_path("..", __FILE__)}" }

  s.pod_target_xcconfig = {
    "SWIFT_SERIALIZE_DEBUGGING_OPTIONS" => "NO",
    "OTHER_SWIFT_FLAGS" => "-Xfrontend -no-serialize-debugging-options",
    "BUILD_LIBRARY_FOR_DISTRIBUTION" => "YES", # for swift Library Evolution
    "SWIFT_REFLECTION_METADATA_LEVEL" => "none", # to include less metadata in the resulting binary
  }

  s.frameworks = 'AVFoundation'
  s.public_header_files = 'Classes/**/*.h'
  s.source_files = Dir['Classes/**/*.{swift}']
  s.resource_bundles = { 'ContextSDK' => ['PrivacyInfo.xcprivacy'] }

  s.test_spec 'Tests' do |test_spec|
    test_spec.source_files = [
      'Tests/*.{swift}',
      'Tests/Resources/*.{plist}'
    ]

    test_spec.dependency 'Quick', '7.2.0'
    test_spec.dependency 'Nimble', '12.2.0'
  end
end
During development, we want to easily edit our codebase, run the Demo app, and debug using Xcode. To do that, our Demo app has a simple Podfile referencing our local CocoaPod:
target 'ContextSDKDemo' do
  use_frameworks!
  pod 'ContextSDK', :path => '../ContextSDK', :testspecs => ['Tests']
end
Running pod install will then nicely setup your Xcode workspace, ready to run the local ContextSDK codebase:
Editing a ContextSDK source file (e.g. Context.swift) will then immediately be accessible and used by Xcode during the next compile. This makes development of SDKs extremely easy & efficient.
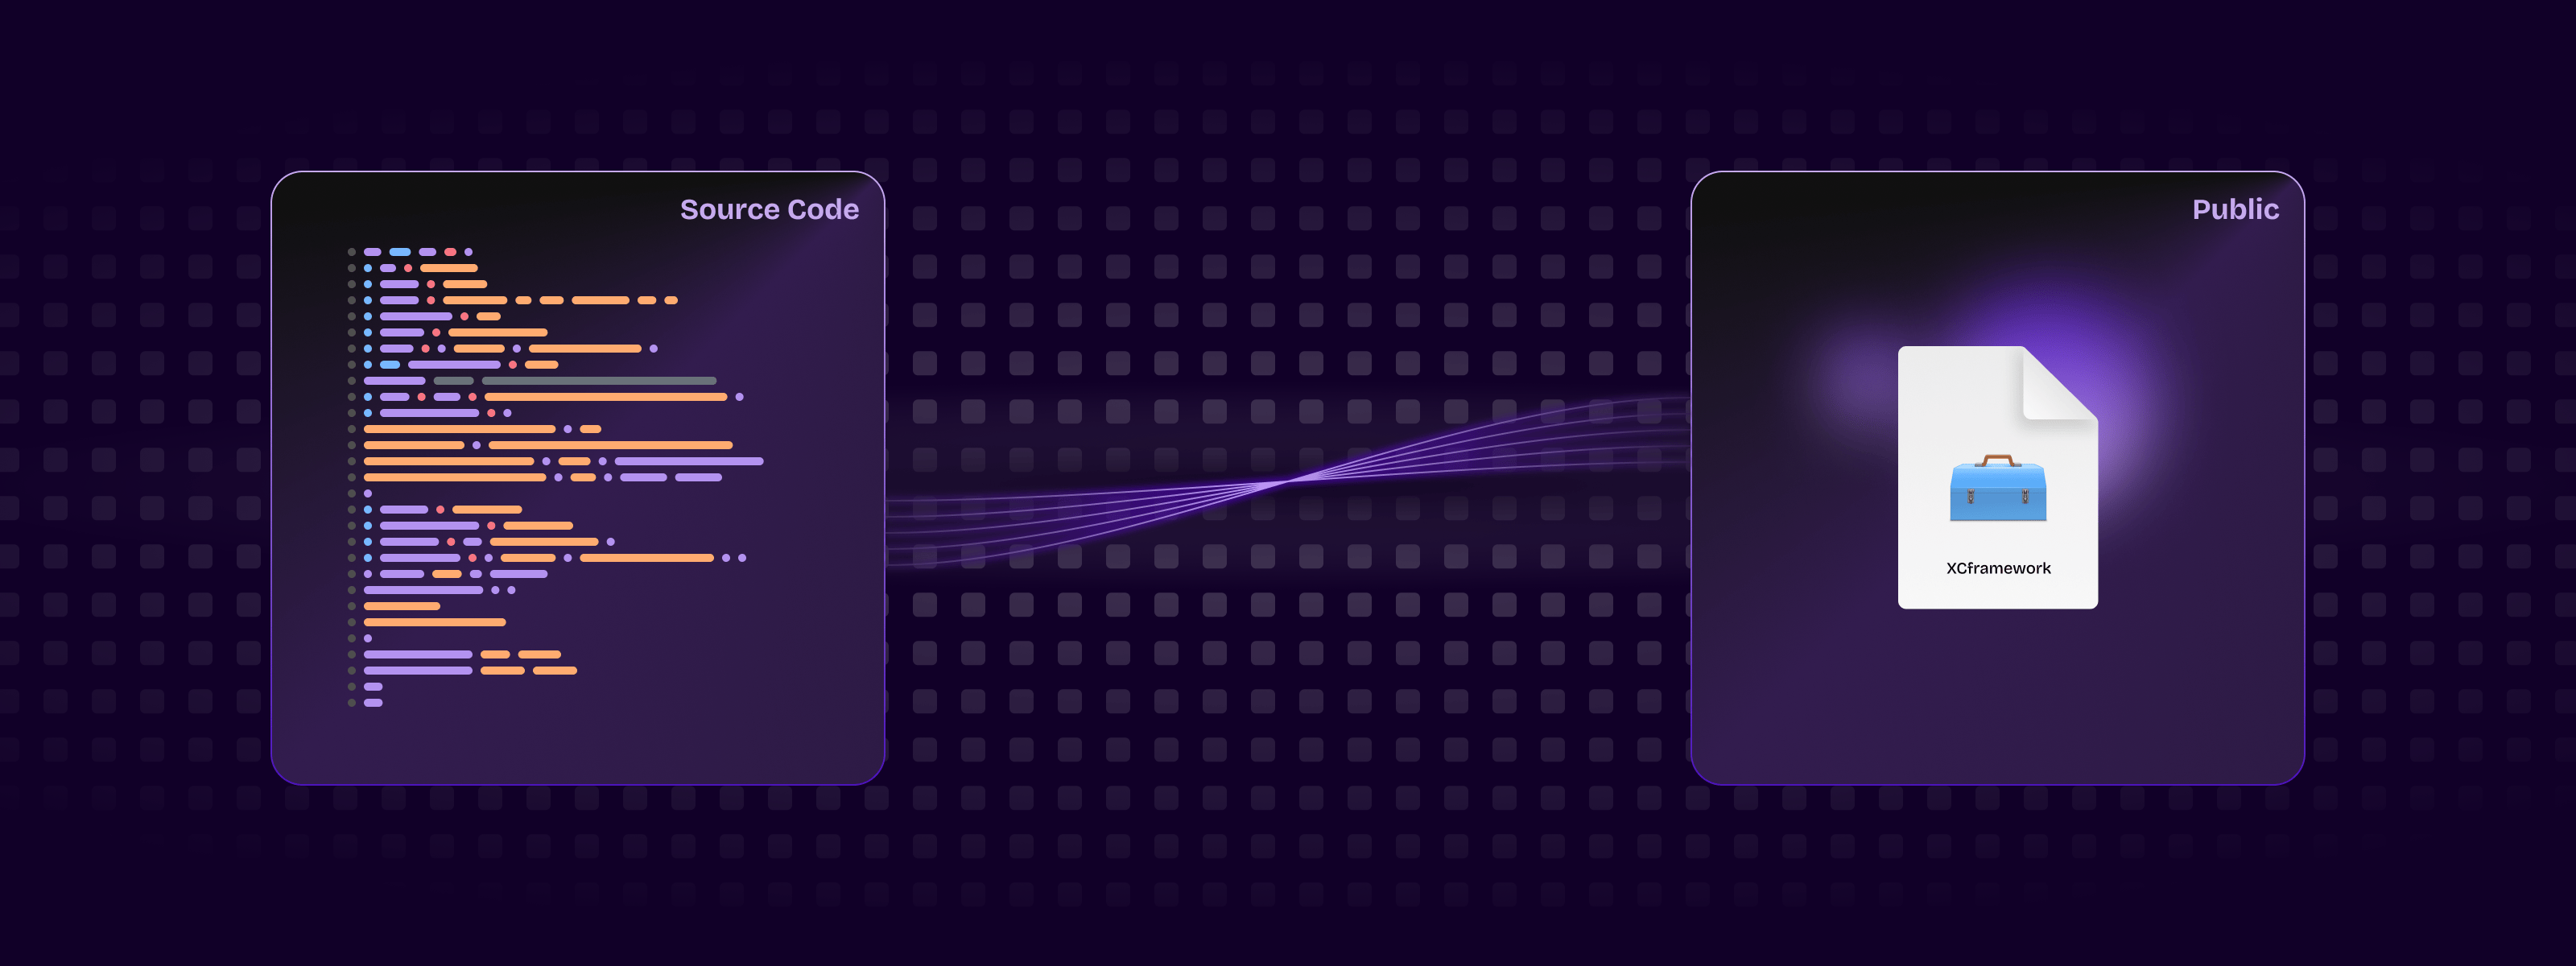
How to compile a CocoaPod into a static binary (xcframework)?
The requirement for commercial SDKs is often that its source code isn’t accessible to its user. To do that, you need to pre-compile your SDK into an .xcframework static binary, which can then be used by your customers.
Thanks to the excellent cocoapods-pack project, started by Dimitris by Square, it’s easily possible to compile your SDK for distribution to your customers. After installing the gem, you can use the following command:
bundle exec pod pack ../ContextSDK.podspec https://contextsdk.com --skip-validation
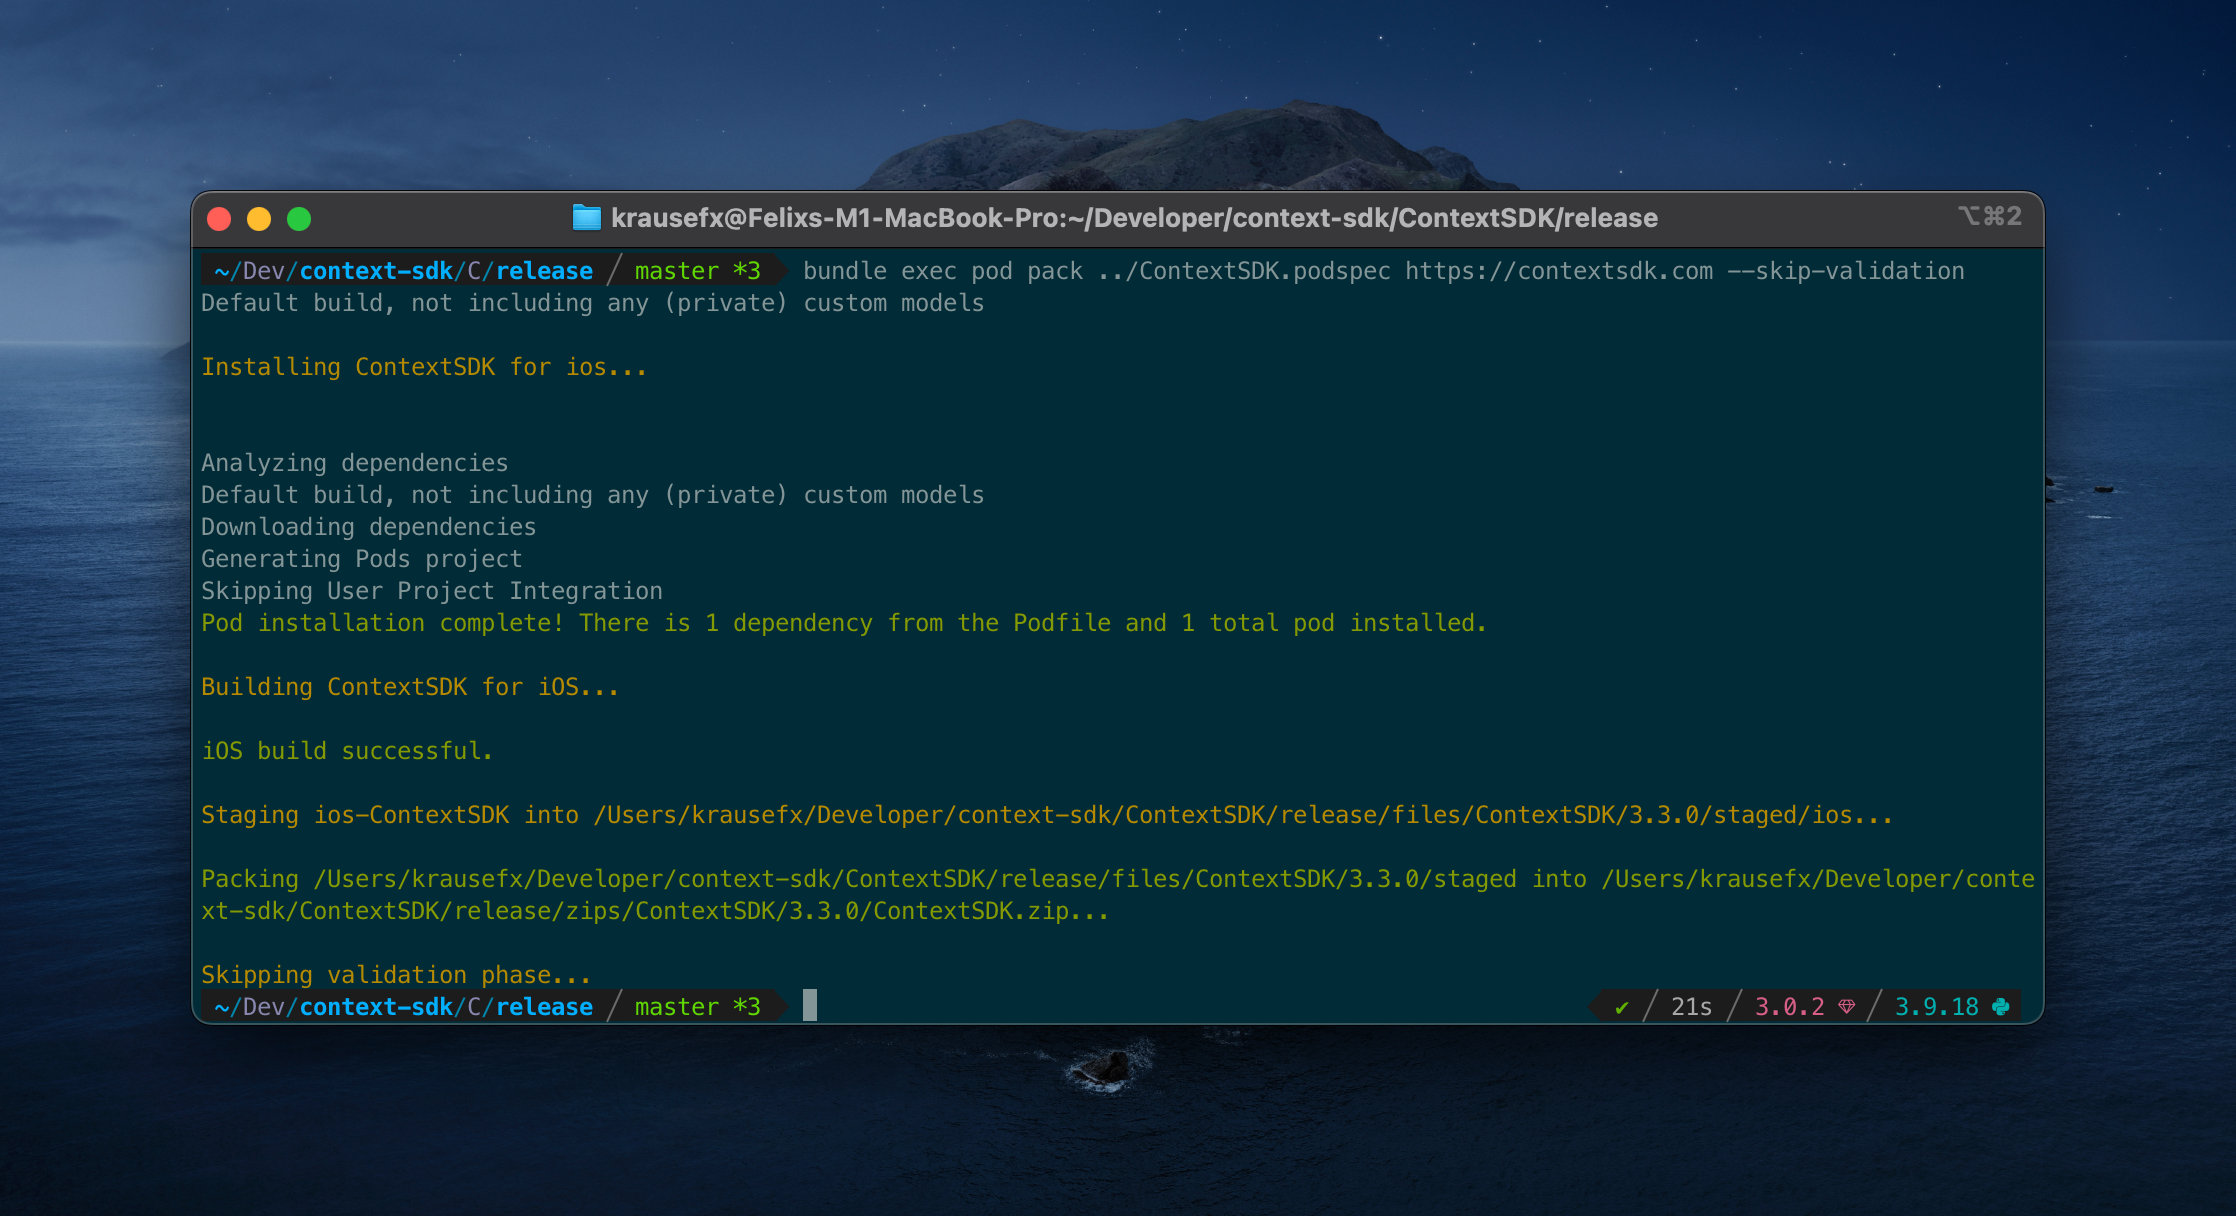
Now open up the folder ./zips/ContextSDK/3.2.0/ and you will see a freshly prepared ContextSDK.zip. You can’t distribute that zip file right-away, as it contains an additional subfolder called ios, which would break the distribution through CocoaPods when we tested it.
As part of our deployment pipeline, we run the following Ruby commands to remove the ios folder, and re-zip the file:
puts "Preparing ContextSDK framework for release..."

sh("rm -rf zips")
sh("bundle exec pod pack ../ContextSDK.podspec https://contextsdk.com --skip-validation") || exit(1)
sh("rm -rf files")

# Important: we need to unzip the zip file, and then zip it again without having the "ios" toplevel folder
# which will break CocoaPods support, as CococaPods only looks inside the root folder, not iOS
zip_file_path = "zips/ContextSDK/#{@version_number}/ContextSDK.zip"
sh("unzip #{zip_file_path} -d zips/current")
sh("cd zips/current/ios && zip -r ../ContextSDK.zip ./*") # Now zip it again, but without the "ios" folder
return "zips/current/ContextSDK.zip"
ContextSDK.zip is now ready for distribution. If you unzip that file, you’ll see the ContextSDK.xcframework contained directly, which is what your users will add to their Xcode project, and will be picked up by CocoaPods.
How to distribute your SDK?
Manual Installation
There are no extra steps needed: the ZIP file you created above is everything that’s needed. Now you can provide the following instructions to your users:
- Download the latest release: [URL to your ZIP file]
- Drag & Drop the
ContextSDK.xcframeworkfolder into the Xcode file list - Go to your project settings, scroll down to
Frameworks, Libraries, and Embedded Content, addContextSDK.xcframework, and selectEmbed & Sign
Through CocoaPods
Distributing your pre-compiled .xcframework file through CocoaPods requires some extra steps.
You need a second ContextSDK.podspec file, that will be available to the public. That podspec will only point to your pre-compiled binary, instead of your source code, therefore it’s safe to distribute to the public.
Pod::Spec.new do |s|
  s.name                = 'ContextSDK'
  s.version             = '3.2.0'
  s.homepage            = 'https://contextsdk.com'
  s.documentation_url   = 'https://docs.contextsdk.com'
  s.license             = { :type => 'Commercial' }
  s.author              = { 'ContextSDK' => 'support@contextsdk.com' }
  s.summary             = 'Introducing the most intelligent way to know when and how to monetize your use'

  s.platform            = :ios, '14.0'
  s.source              = { :http => '[URL to your ZIP file]' }

  s.xcconfig            = { 'FRAMEWORK_SEARCH_PATHS' => '"$(PODS_ROOT)/ContextSDK/**"' }
  s.frameworks          = 'AVFoundation'
  s.requires_arc        = true
  s.swift_version       = '5.7'
  s.module_name         = 'ContextSDK'

  s.preserve_paths      = 'ContextSDK.xcframework'
  s.vendored_frameworks = 'ContextSDK.xcframework'
end
Make both your podspec, and your ZIP file available to the public. Once complete, you can provide the following instructions to your users:
- Add the following dependency to your
Podfile:pod 'ContextSDK', podspec: '[URL to your public .podspec]' - Run
pod install
Through Swift Package Manager (SPM)
Create a new git repo (we called it context-sdk-releases), which will contain all your historic and current releases, as well as a newly created Package.swift file:
// swift-tools-version:5.4

import PackageDescription

let package = Package(
    name: "ContextSDK",
    products: [
        .library(
            name: "ContextSDK",
            targets: ["ContextSDK"]),
    ],
    dependencies: [],
    targets: [
        .binaryTarget(
            name: "ContextSDK",
            path: "releases/ContextSDK.zip"
        )
    ]
)
You can use the same zip file we’ve created with SPM as well. Additionally, you’ll need to make use of git tags for releases, so that your customers can pinpoint a specific release. You can either make this repo public, or you’ll need to manually grant read permission to everyone who wants to use SPM.
To your users, you can provide the following instructions:
- Add
https://github.com/context-sdk/context-sdk-releasesas dependency
Conclusion
As we were building out our automated SDK distribution, we noticed there aren’t a lot of guides online around how to best develop, build and distribute your SDK as a pre-compiled binary, so we hope this article helps you to get started.
If you have any questions, feel free to reach out to us on Twitter or LinkedIn, or subscribe to our newsletter on contextsdk.com.
Note: This is a cross-post of the original publication on contextsdk.com.
Tags: ios, context, sdk, swift, xcframework, compile, distribute, automation, fastlane | Edit on GitHub